May 11, 2016
Comparison of Ricoh Theta S and Panono 360˚ Cameras

Theta S and Panono side-by-side
360˚ photos and video are the latest rage. If you visited the NAB (National Association of Broadcasters) convention in Las Vegas in 2016, VR was everywhere and hard to miss. With more and more cameras hitting the streets, these will become more common and easier to use. I’ve used a couple and will share my experiences.
For the last few months, I have been shooting with the Theta S and have enjoyed the pictures it provides. The video? It has some room for improvement, but I’ll get to that shortly. One of my clients received the Panono camera and was kind enough to let me borrow it for the weekend. Unfortunately, my weekend schedule didn’t allow much time with the Panono, but I shot enough to provide a brief comparison of the two cameras.
Both cameras provide a full 360˚ experience; have a smartphone app to control the camera and many of its functions; have websites they upload the photos to, and have fixed, internal storage.
The basic differences:
- Theta $350US Panono $1,500US
- Theta has 2 lenses. Panono has 36 lenses.
- Theta shoots photos and video. Panono only shoots photos.
- Theta provides a live stream of the scene on your phone so you can rough in the shot before shooting. Panono does not yet have this feature.
- The Panono has a “selfie stick” that allows you to connect the camera to the end of an 18” (45cm) stick with a button.
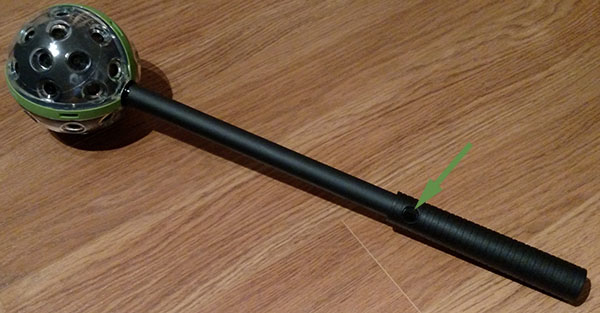
Panono selfie stick. Arrow is pointing to the shutter button.
- Equirectangular resolution for Theta resolution is 5276 x 2688. Panono is 16384 x 8192.
- Theta photo processing is done in camera. Theta video requires a computer to process. Panono is all done in the cloud. This has some major impacts as discussed later.
- The Theta fits in your pocket. Panono, well…do you have big pockets?
Theta has both a micro-USB and micro-HDMI. This allows streaming of video, but I have not experimented with this feature. The main issue is the tripod mount and all the connections being on the bottom of the camera.
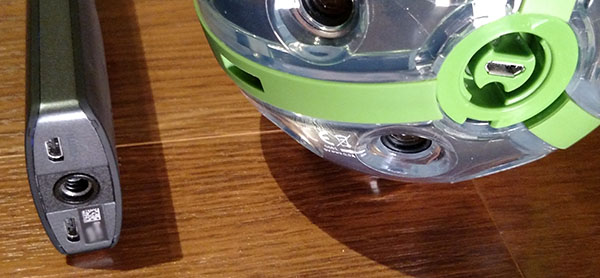
Comparison of the connections.
How do you mount the camera on a tripod and connect a USB cable? Panono has a micro-USB for charging and connecting to a computer. I like the Panono tripod mount since it includes a “remote” micro-USB port on the side of the post.
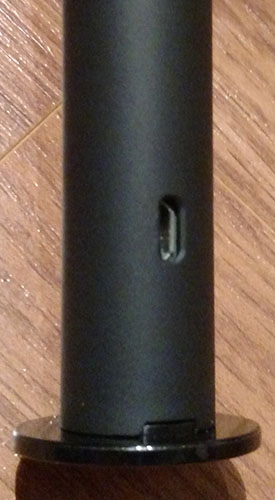
Panono remote USB port on tripod mount
Ricoh recently released a short extension that allows you to connect to a tripod. This short 2.2-inch (5.58cm) extension will allow you to reach the connections on the bottom of the camera.
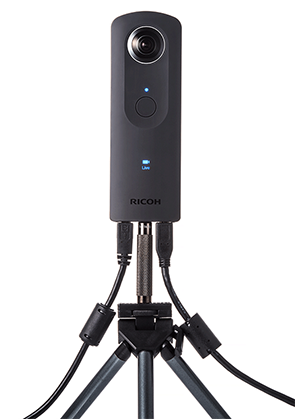
Tripod extension for the Theta. Photo courtesy of Ricoh.
Since it is a ball, the Panono takes advantage of the fact that people will want to throw the ball in the air. They have installed a velocity meter or accelerometer that will snap a photo when the camera is tossed in the air. It says the ball must travel between 1.5m and 4m (60 inches and about 13 feet). After the ball reaches the top, it senses it is falling and snaps a picture. There are settings to restrict the camera from taking a photo if the ball is spinning too much, which I tried and finally settled for automatic.
Obviously it takes some practice to toss the ball with no spin. If you plan on throwing this, make sure you can catch it. The hard plastic won’t like a fall to the ground – especially if the ground is pavement. Future, more consumer-oriented models are supposed to be break-resistant. There is the ability on the website to correct the horizon, which is a must.
I realize the Panono is a first release camera with Beta software. The software has several features (such as “Timer”) that say, “Coming soon…” It is also still a little buggy and crashes, but I won’t knock it for that. It’s beta – I get it.
In Use:
I’ve taken hundreds of photos with the Theta and it is always fun. When we have a group of people, whether they are kids or adults, we gather them around in a circle and snap a couple pictures. The camera combines the two spheres into an equirectangular image and sends it to the phone via Wi-Fi. You can view the image and pass around the phone within seconds. That almost instant gratification is something missing in the Panono, which has to send the images to the cloud to stitch together the images – more on that in a bit.
Both cameras create their own Wi-Fi network so the camera can connect to them. This allows you to transfer images pretty quickly from camera to phone no matter where you are. You could be in a desert, miles from civilization and be able to transfer the photos.
With the Theta, after the photo is on your phone, you can share it to Facebook and Twitter from within the app. There are growing communities of people sharing and liking 360˚ photos. You can choose to share a particular orientation if you like. All of this can be done while in the field, using only the data on your phone.
On the Panono, photo taking and sharing is not as much fun. This camera provides higher resolution, but lower instant gratification. After snapping a picture, the images must be downloaded to your phone. No processing is done yet, you just have a collection of photos saved somewhere on your phone. Once you get back to civilization and connected to the Internet, you can upload the photos to the Panono cloud for processing. I don’t know if the app restricts this process to “only via Wi-Fi” but you would certainly chew through your data plan if not. One image is at least 23MB and if you take an HDR photo, it will be 108 small images (36 cameras x 3) and be between 80MB and 120MB.

The three exposures used to make an HDR image.
The Panono’s 36 cameras take 2064 x 1552 pixel images and stitch them together to form an image that is 16384 x 8192. The stitching process varies depending on the image and if it was HDR, but I found the time to be around 10 minutes. Then after the image is processed, you can view it online or download it to your phone for viewing.
Video quality of Theta is average to poor. Depending on the conditions, the picture can look nice, especially outdoors or in good lighting. It records video that is 1920 x 1080, but the processed equirectangular video is 1920 x 960.
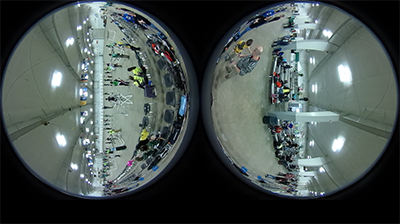
Original video output by the Theta S, 1920 x 1080.
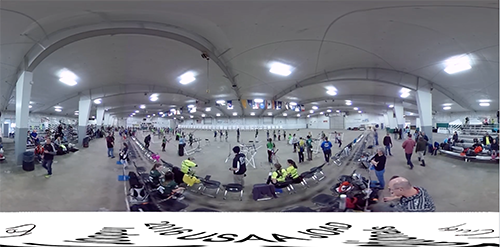
Processed video from the Theta S (with my graphic added to the bottom), 1920 x 960.
This footage is from an indoor archery tournament in Michigan. Nothing terribly exciting, but it gives you an idea of what the footage looks like. One issue I’ve seen with the video is shifting color balance. While walking through a manufacturing plant, the color shifted multiple times. The lighting seemed to be consistent with overhead fluorescent and yet the color would pop from one temperature to another.
The Theta allows for manual adjustment of color, shutter speed, ISO – but only in photo mode. When you switch over to video, it goes into auto mode, so you get what you get. I wish there were manual settings for this as well.
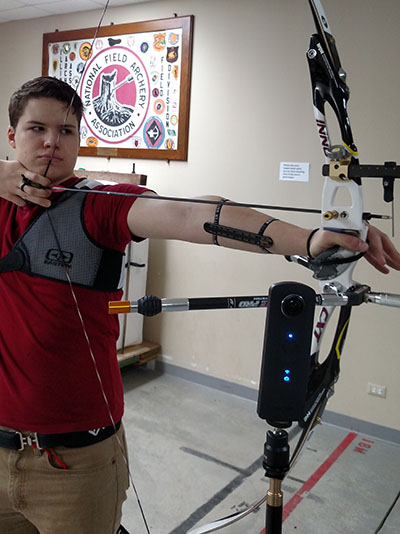
Shooting with the Theta S
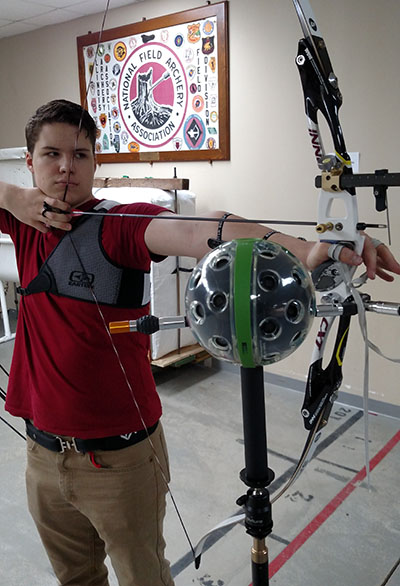
Shooting with the Panono
Summary:
I realize I am comparing two cameras that are vastly different in terms of cost and time on the market. The Ricoh Theta S is a second-generation camera and the software has been tested by thousands of people. The Panono is a newer camera, but offers lots of promise. If Panono can provide some from of processing in the field without having to upload all my images and wait for the processing, I would give it a better score. For simple photos with family and friends, the Theta S is the best option. Even for commercial use, the photos from the Theta are good and given that many people will be viewing them with their phone, the quality is just right.
There are a few features I like about the Panono including the selfie-stick and the ability to throw it in the air. However, these features do not compel me to buy this camera. It is also bulky while the Theta is small enough that it can be carried in a pocket.
I’m happy with the Theta S and for higher-end video projects, I will seek other alternatives to deliver higher quality video that clients demand.